Open Composer User Manual
1. Introduction
Open Composer is a web application to submit batch jobs to an HPC cluster system from a web browser. Open Composer consists of "Home page", "Application page", and "History page".
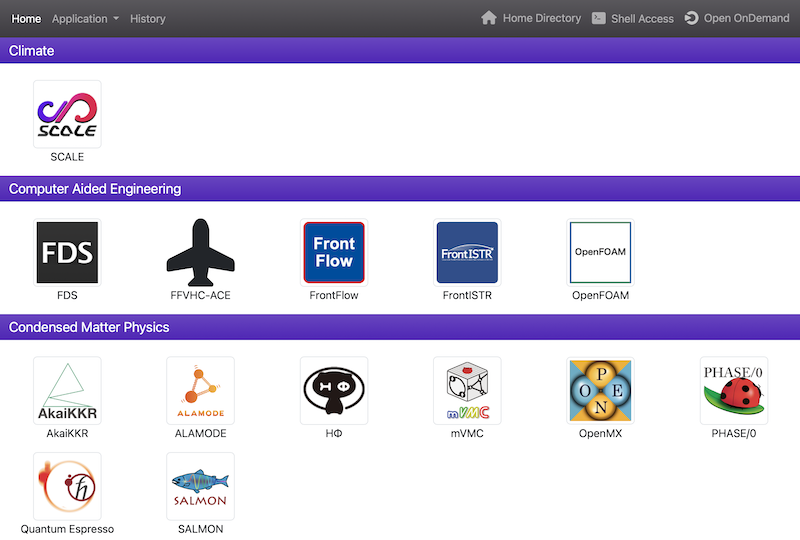
2. Home Page
Displays application icons by category.
On the left side of the navigation bar are links to the "Home page", "Application page", and "History page".
On the right side of the navigation bar are links to the Open OnDemand "Home Directory", "Shell Access", and "Dashboard".
Note that "Shell Access" is only displayed if login_node is set in conf.yml.erb.
3. Application Page
Generates a job script. When you enter values in the web form on the left side of the page, a job script is dynamically generated in the text area on the right side of the page. The text area can be freely edited. When you click the "Submit" button below the text area, the generated job script is submitted to an HPC cluster system.
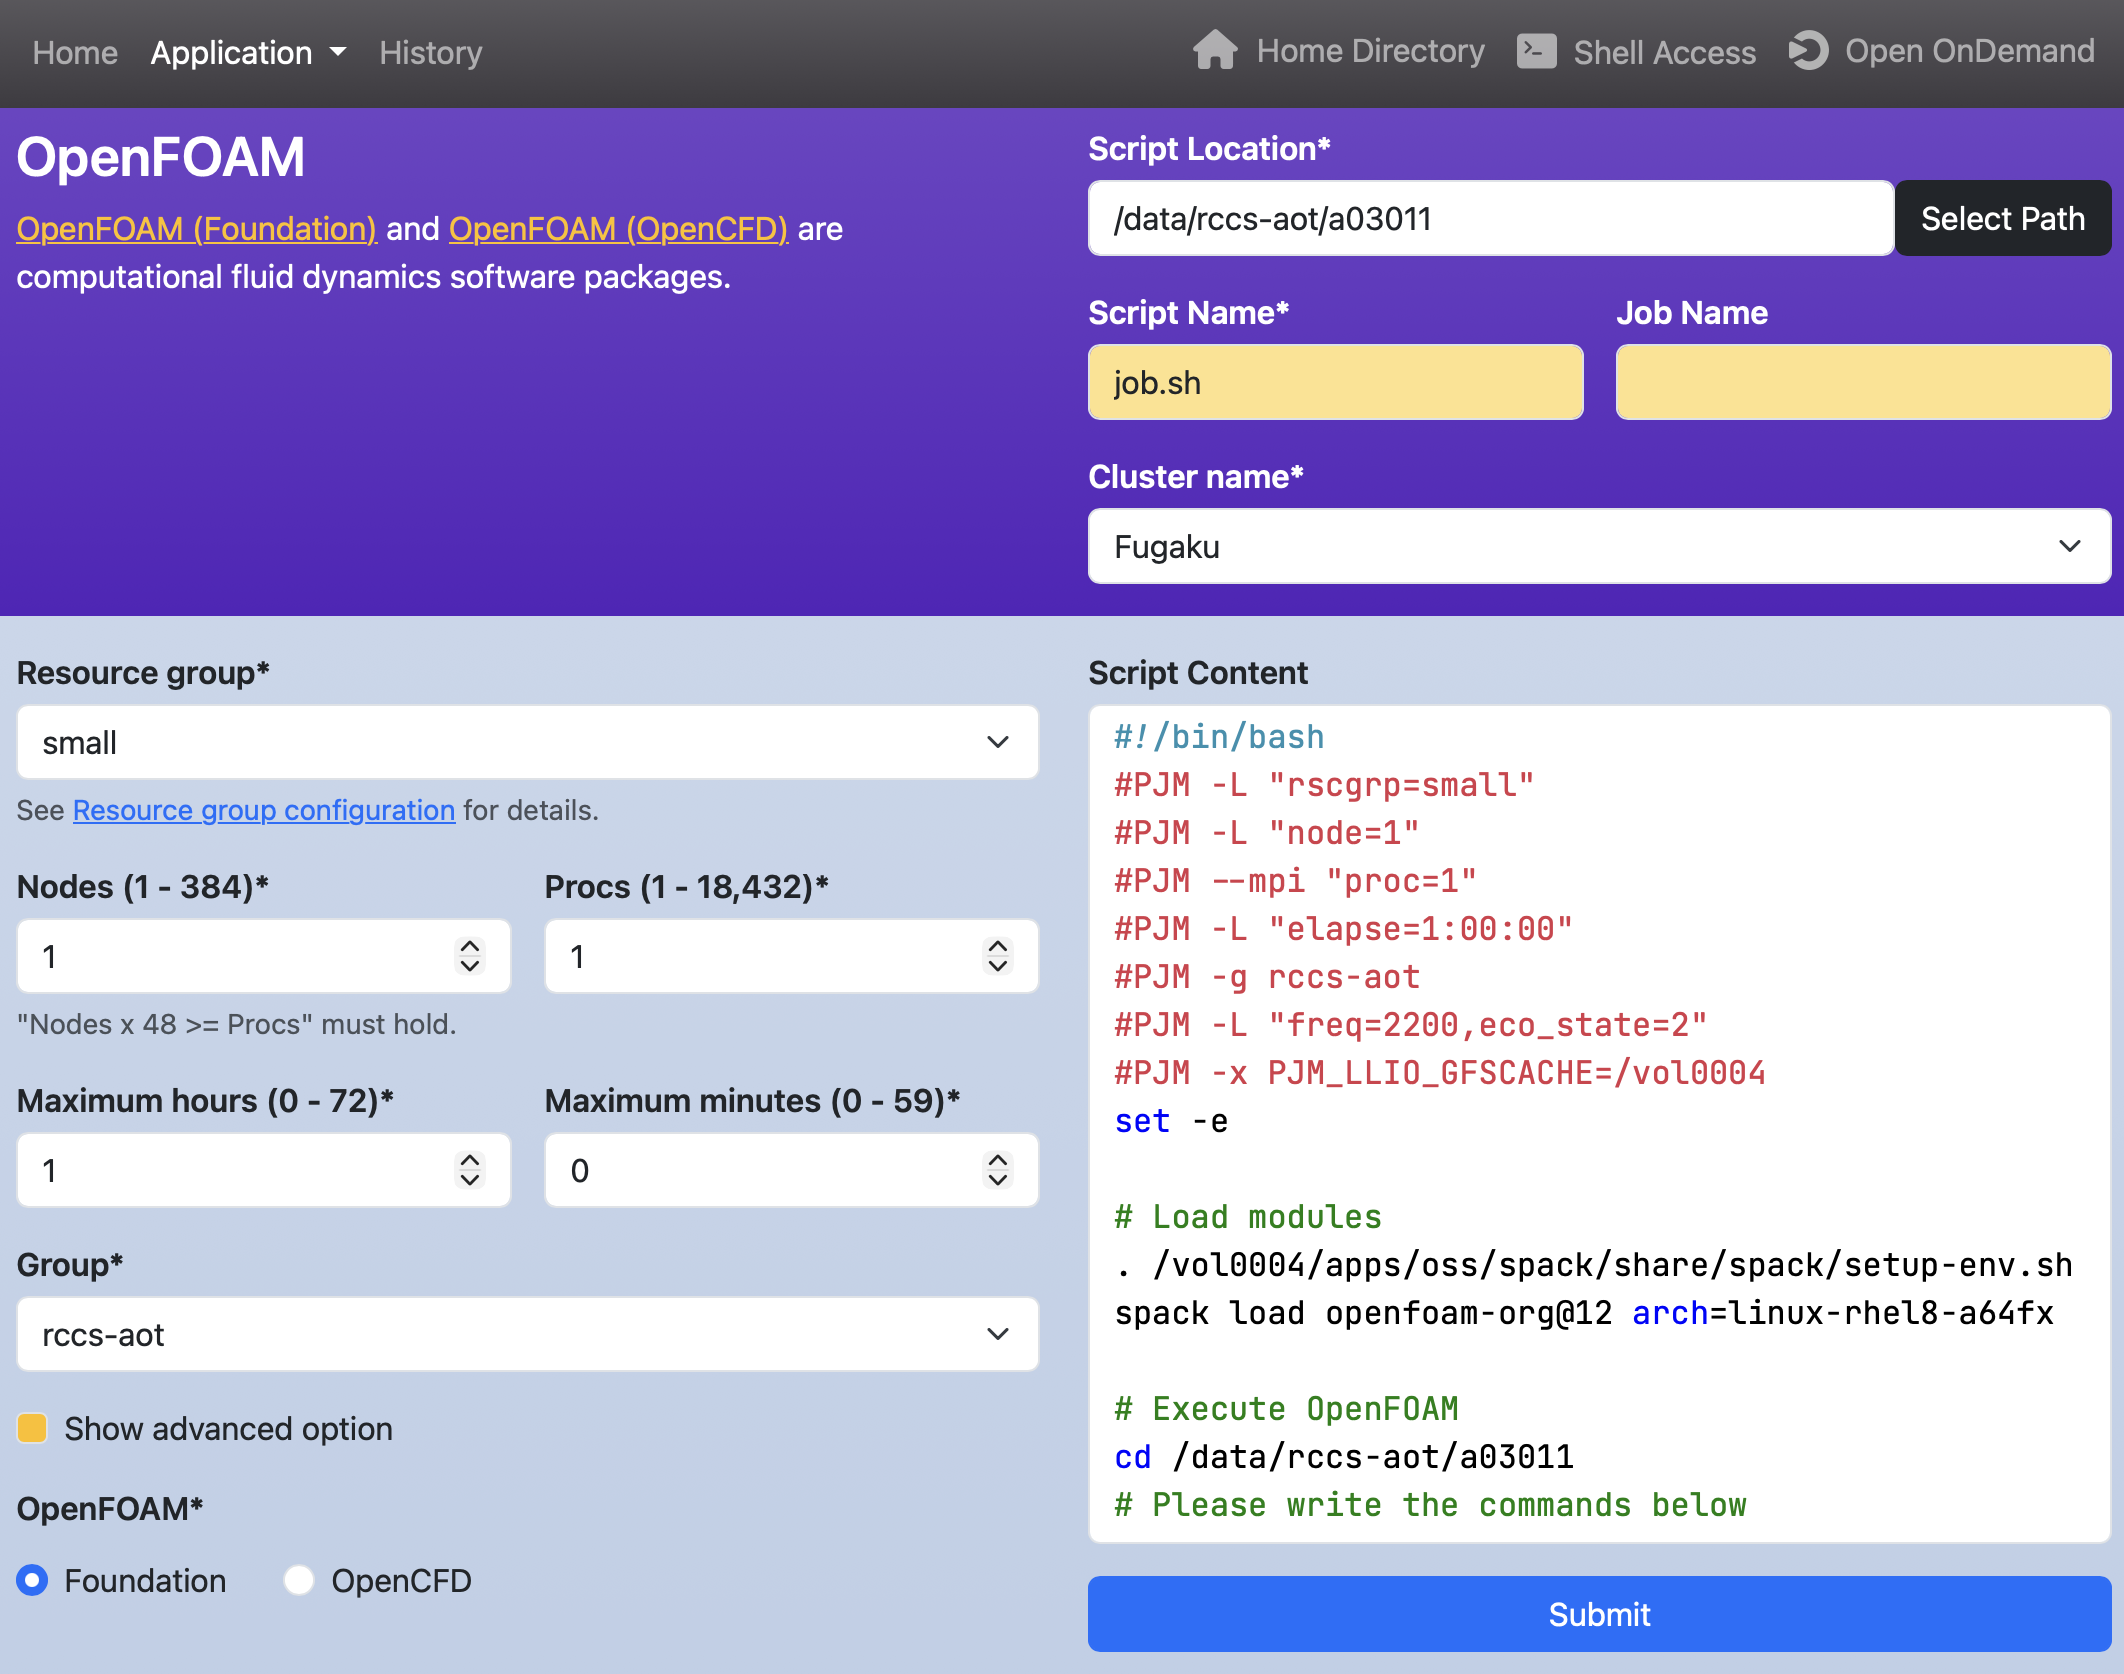
- The "Script location," "Script name," and "Job name" in the header section specify the "Directory where the job script is stored," "Name of the job script file," and "Job name," respectively.
- The "Cluster name" in the header section is only displayed if multiple job schedulers are configured. The job script will be submitted to the selected cluster.
- An asterisk next to the label of a web form indicates that it is a required field.
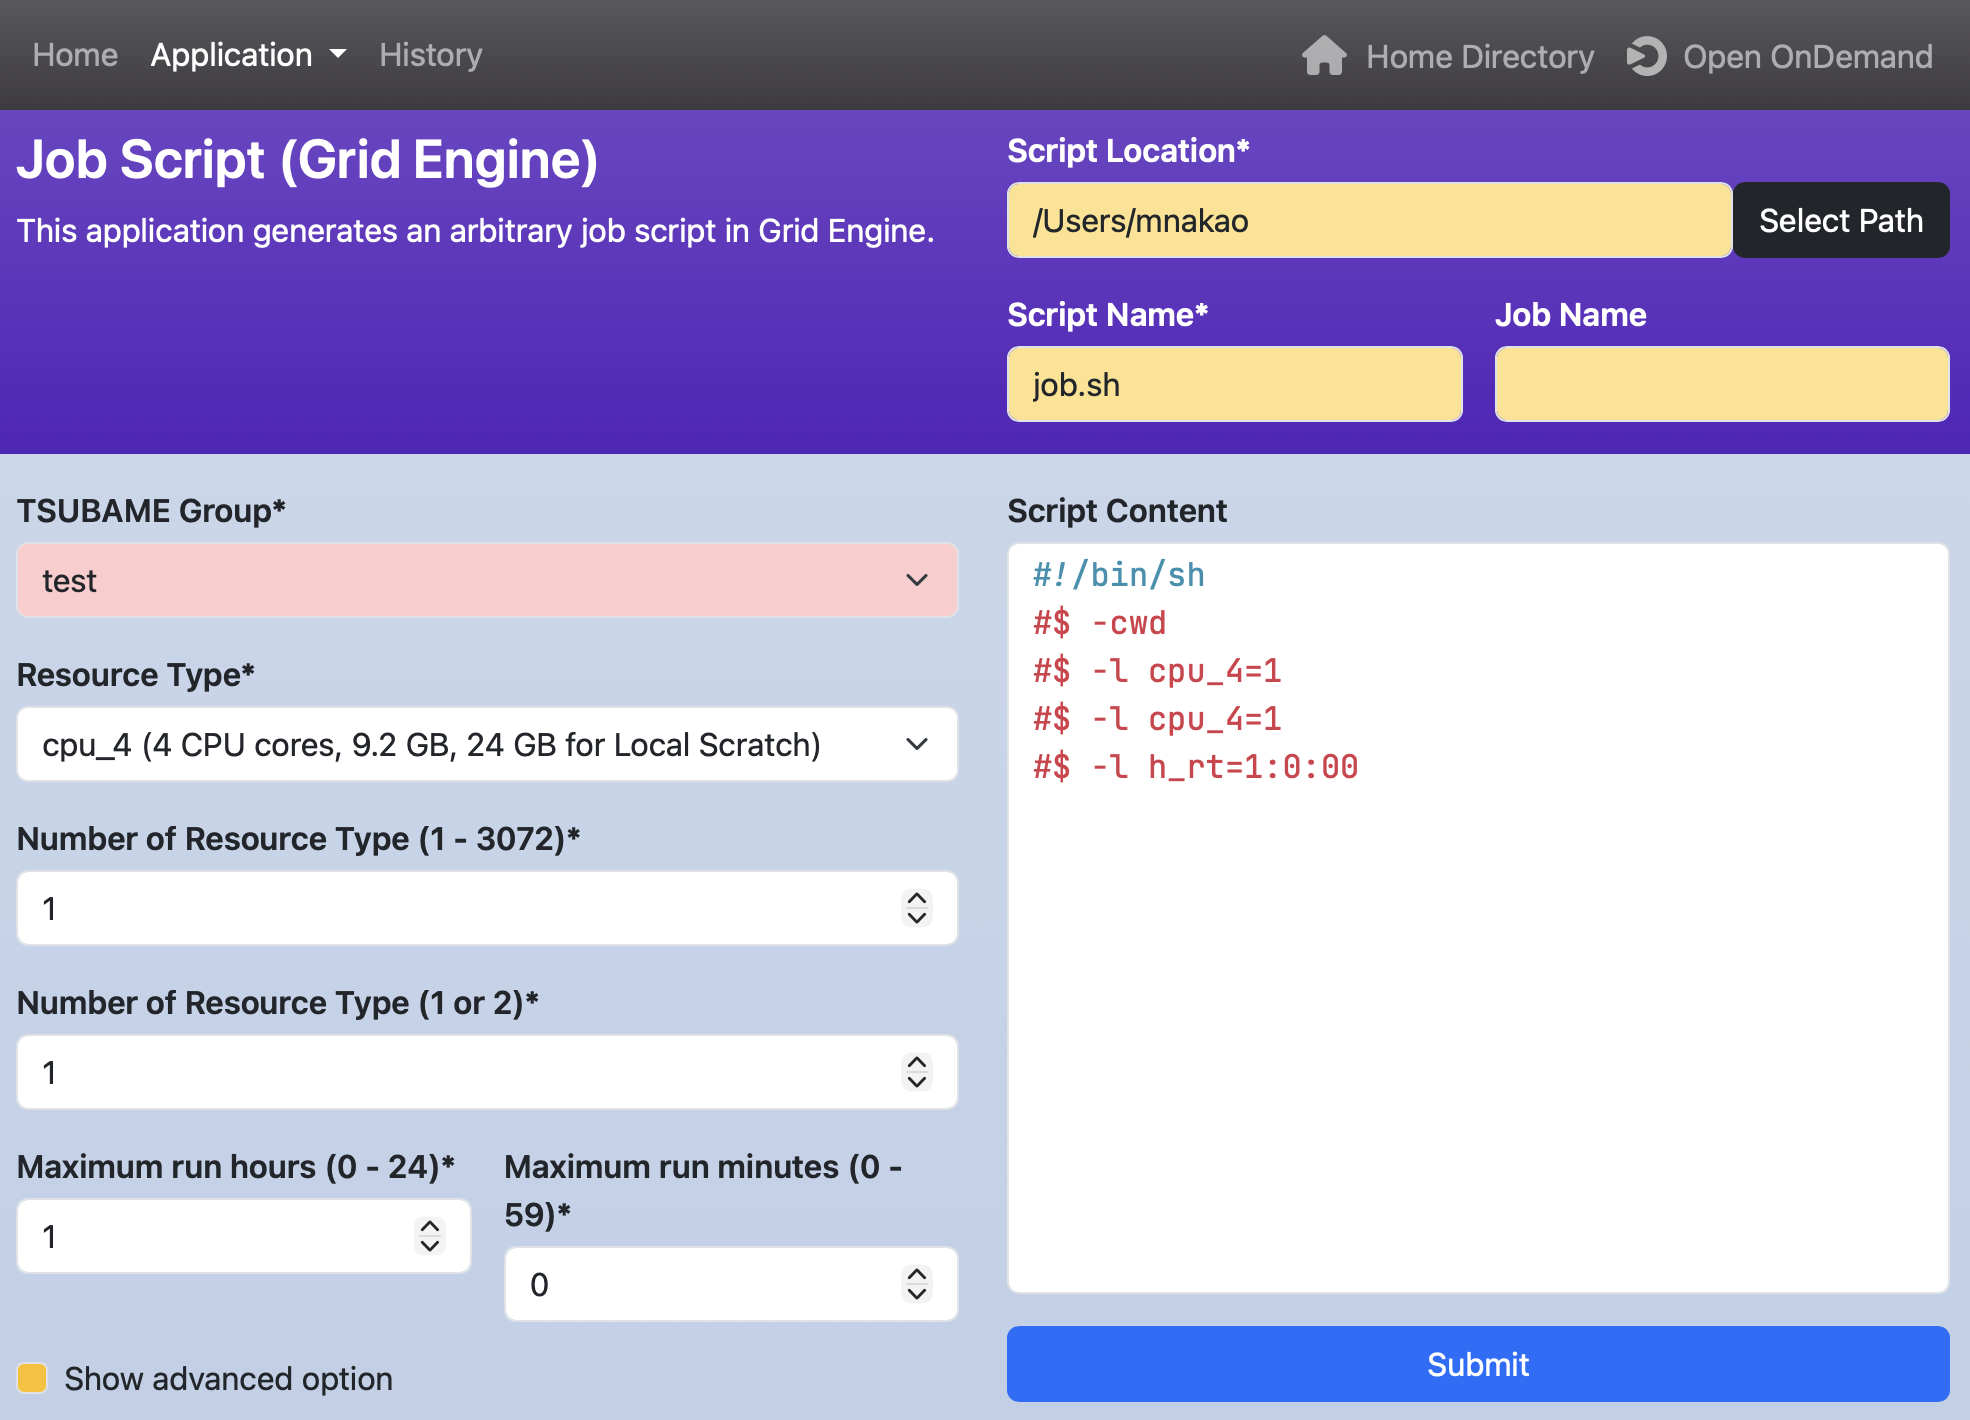
- If you try to modify a web form with a white background after manually editing the job script, a warning like the one shown below will appear.
If you click "Discard and continue", the changes made in the job script will be discarded and a new script will be generated.

- If the background color of the web form is yellow, it indicates that neither the job script nor the script that performs processing before job submission will be modified.
- If the background color of the web form is pink, it indicates that only the script that performs processing before job submission will be modified. If you try to modify these web forms after manually editing that script, the same warning described above will appear.
4. History Page
You can browse the job history. You can also check the status of jobs and cancel running jobs. The page consists of four sections: Filter, Jobs, Actions, and Display.
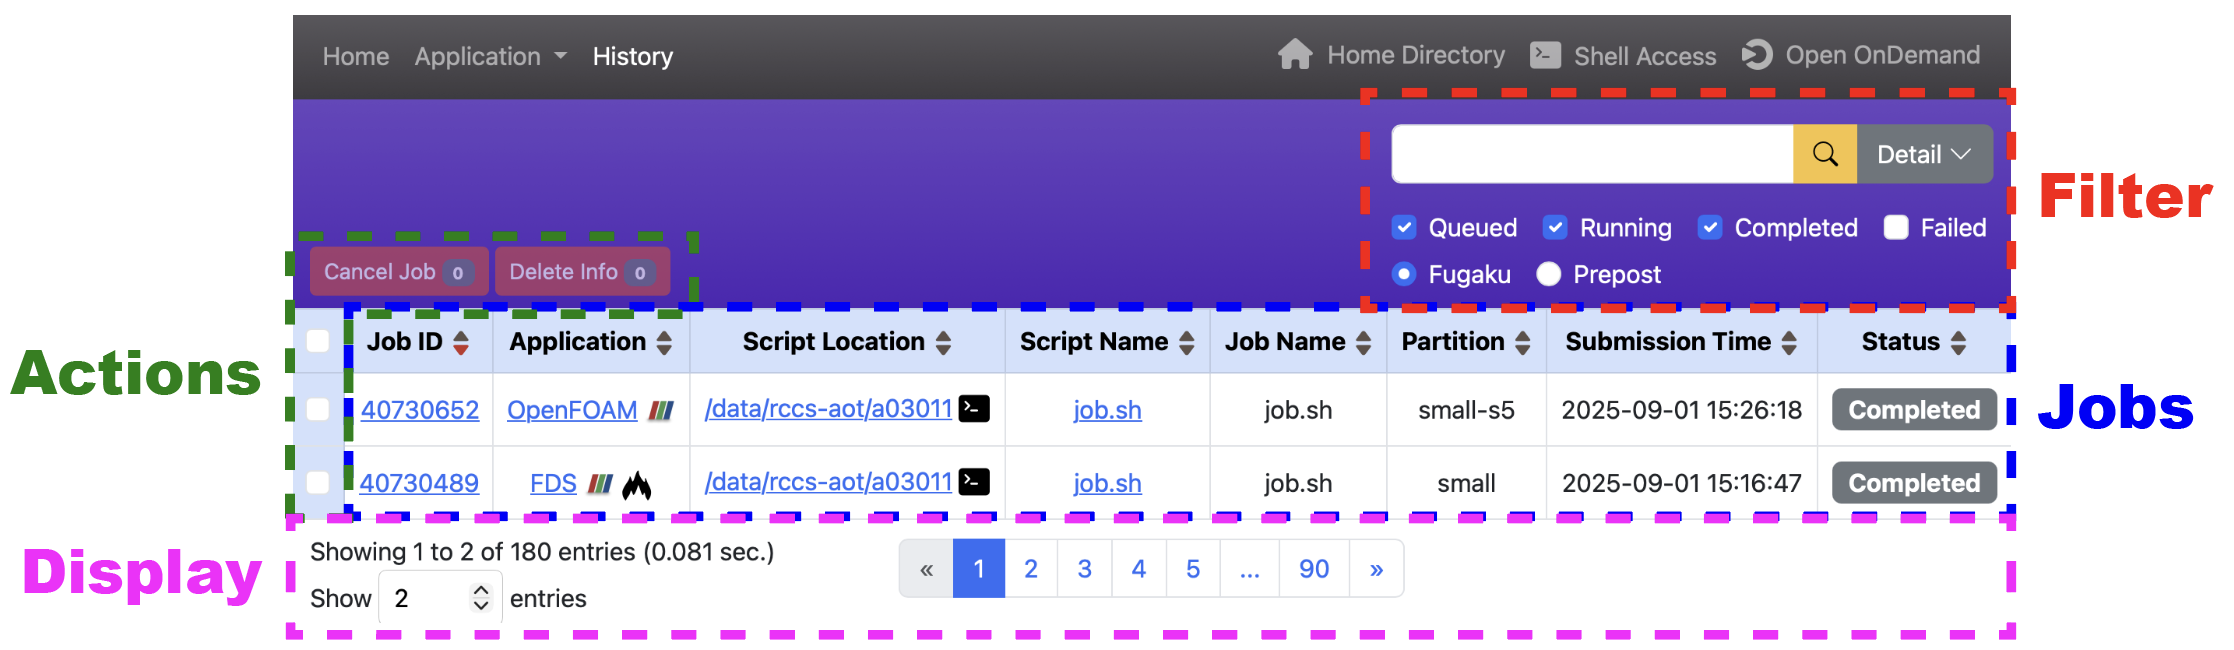
- Filter
- This section allows you to filter job history and search for specific jobs.
- Enter text in the input field and press Enter to display only the jobs that match the input in the table.
- Click the "Detail" button to perform more advanced searches such as AND/OR conditions, filtering by specific fields, and specifying a time range.
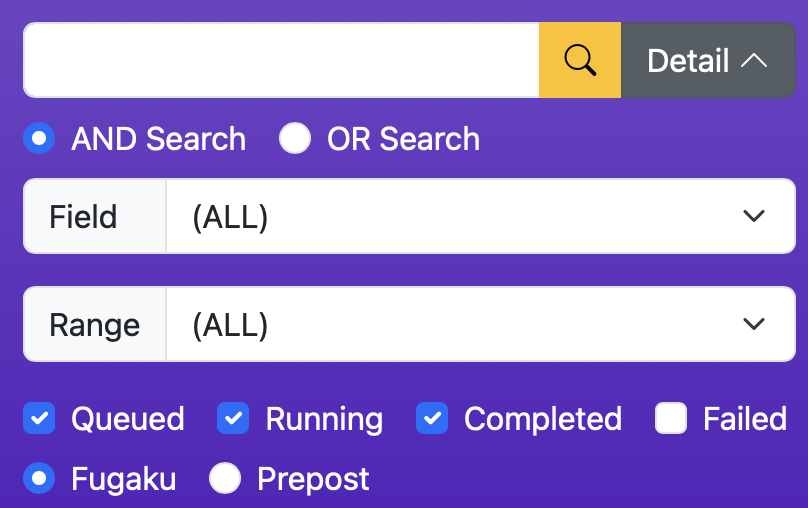
- You can filter jobs by their status using the checkboxes: "Queued", "Running", "Completed", and "Failed".
- If multiple job schedulers are configured, radio buttons will appear below the status checkboxes. You can select a scheduler to display only its jobs (e.g., "Fugaku" and "Prepost"; labels depend on configuration).
- Jobs
- This section displays the list of jobs.
- Click ▲ or ▼ in the table header to sort the entire table in ascending or descending order using that column as the key. The default order is descending by Job ID.
- Click the "Job ID" link to view detailed information about the job.
- Click the "Application" link to open the corresponding application page. If an icon is shown next to the application name, clicking it will open the Open OnDemand application page directly.
- Click the "Script Location" link to open the Open OnDemand Home Directory. Clicking the terminal icon will launch the Terminal application.
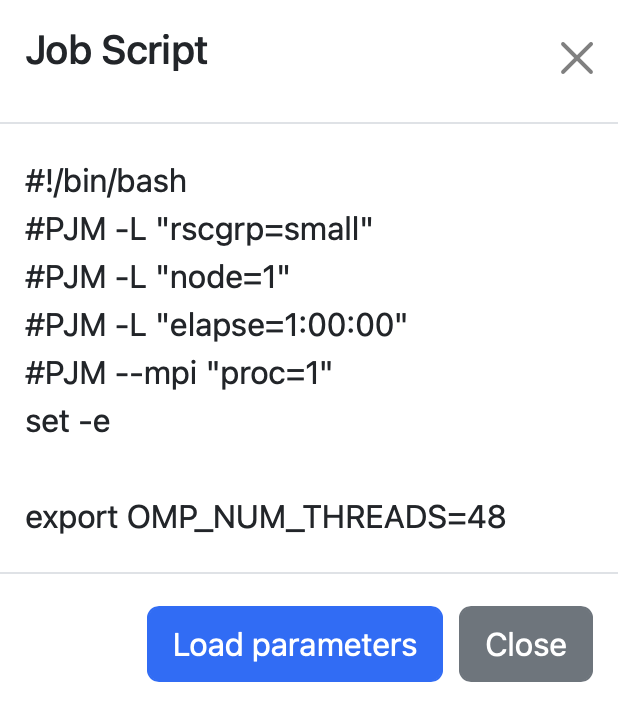
- Click the "Script Name" link to view the executed job script. Clicking "Load parameters" will open the application page with the parameters used for that job preloaded.
- Actions
- This section allows you to perform operations on selected jobs.
- Select jobs using the checkboxes on the left side of the table, then click "Cancel Job" to cancel queued or running jobs. Click "Delete Info" to remove completed job information from the table.
- You can select multiple jobs and perform actions on them at once.
- Selecting the checkbox at the top of the table selects all jobs displayed on the current page.
- Display
- This section controls how the job list is displayed, including the number of entries and pagination.
- At the bottom of the screen, the number of displayed entries, total entries, and the time taken to generate the table are shown.
- Enter a number in "Show entries" and press Enter to change the number of entries displayed per page.
- Click page numbers to navigate between pages.